
Getting started with Sendora: from import to first send
Follow the complete journey to prepare and import contacts, configure your sender, create and test a campaign, and complete your first send.
This guide takes you to one practical outcome: sending your first properly configured campaign to a legitimate contact list. It does not explain every obvious button. Instead, it helps you make the right decisions in the right order and avoid the mistakes that can block a send.
Before you begin, prepare:
- a CSV or Excel file containing contacts you are allowed to email;
- a professional sender address your recipients will recognize;
- the subject, message, and goal of your campaign;
- access to your domain's DNS if you want to authenticate your sending domain.
1 Prepare your contacts
Start with a useful list rather than a large one. Remove obviously invalid addresses, duplicates, and anyone who has already unsubscribed. Do not import a purchased list. It increases complaints, bounces, and the risk of your sending being blocked.
Your file should contain one row per contact and a clearly identifiable email column. You can also retain first name, last name, company, or phone details when they are useful and were collected legitimately.
Sendora offers optional email verification credits that can be purchased on demand and do not expire. After importing, verification is recommended to identify invalid addresses before sending, reduce bounces, and protect deliverability. Read Cleaning a list with email verification to interpret every result.
Importing someone into email software does not give you permission to contact them. Make sure you have consent or another valid legal basis and retain the source of each contact.
2 Create a list and import the file
Create a list whose name clearly describes the audience, such as “Store customers,” “Trade show prospects 2026,” or “Monthly newsletter.” This name remains internal and helps you choose the right recipients later.
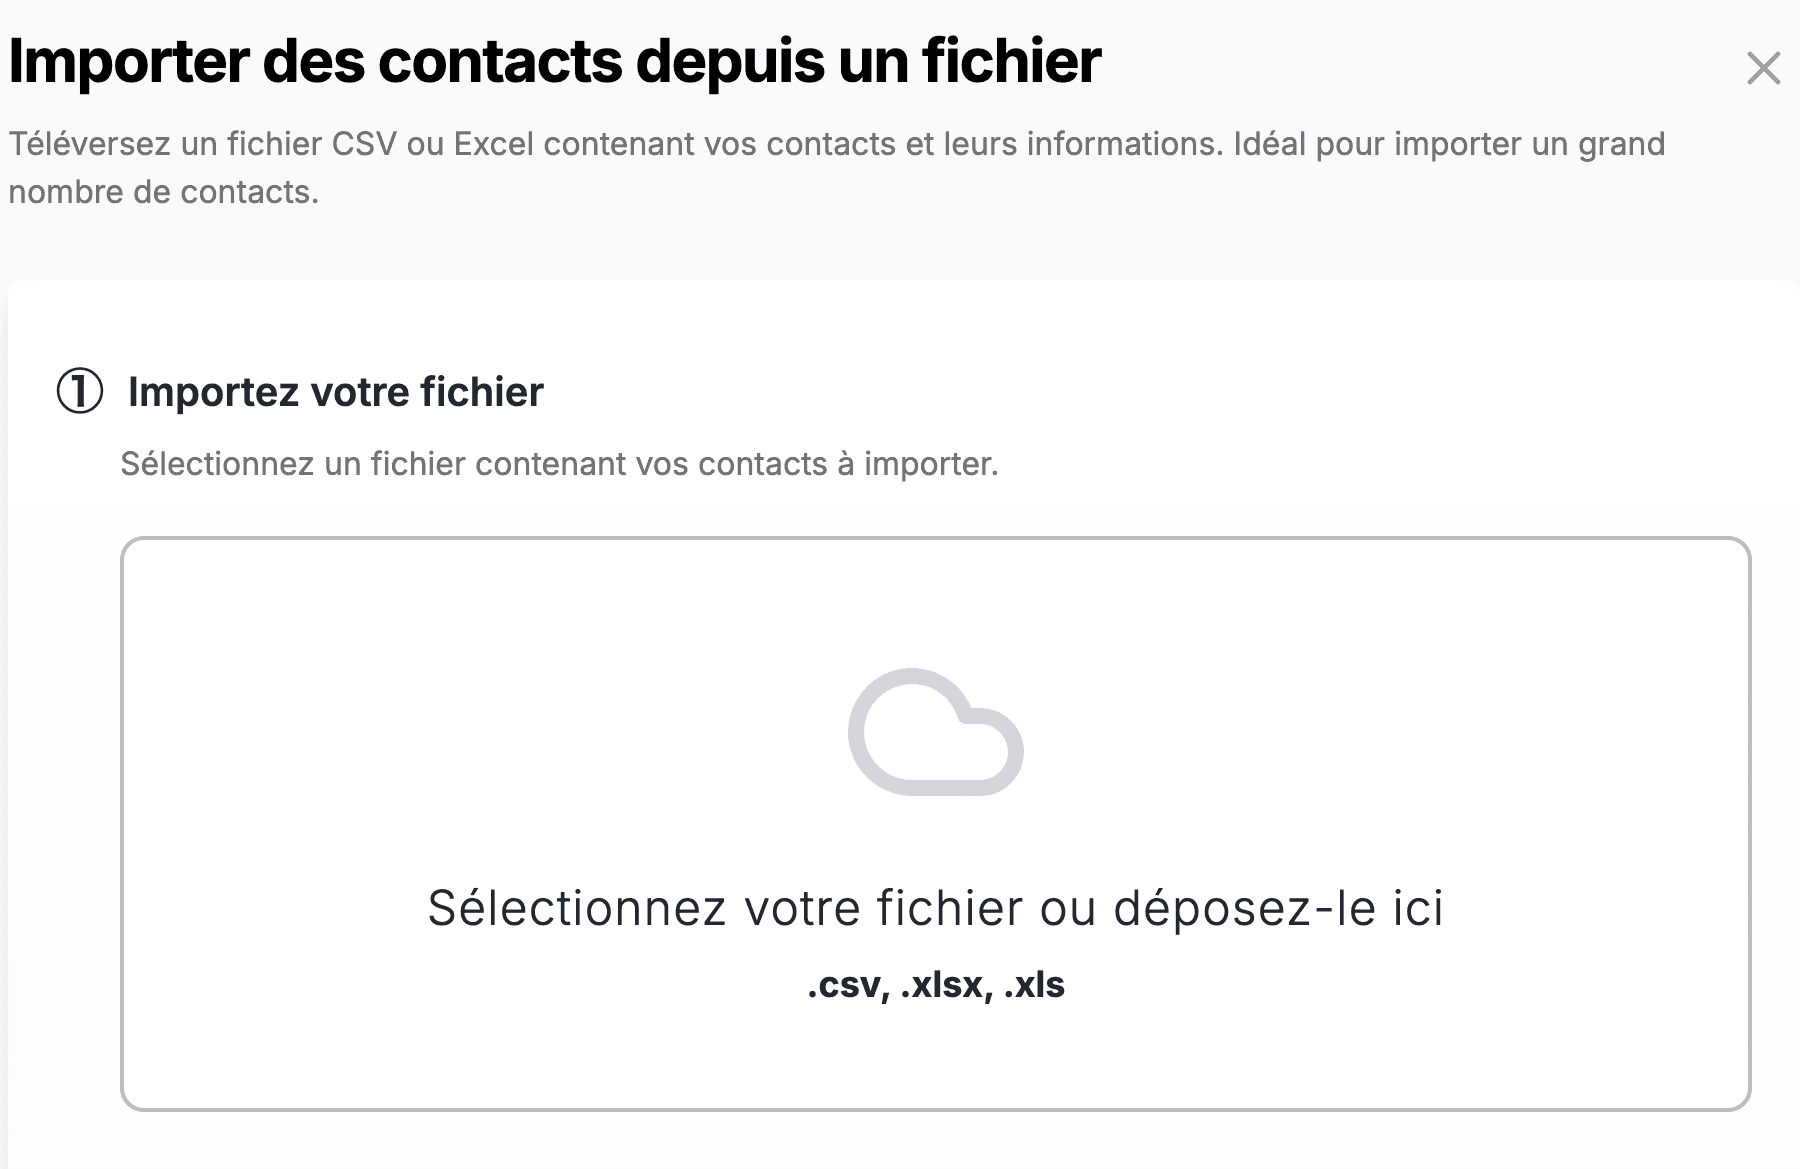
Start the CSV or Excel import, match every file column to the correct Sendora field, and review the summary before confirming. When processing is complete, check the number of imported contacts and any rejected rows.
If the file contains very different audiences, create separate lists. A relevant message sent to a specific group usually performs better than one generic message sent to everyone.
3 Configure your sender
The sender is the name and address shown in the inbox. Use a recognizable name, such as your brand or a person associated with the company, and an address that someone actually monitors so recipients can reply.
To send from your own domain and improve trust in your messages, authenticate it with the records provided by Sendora. You only need to do this once. Follow Authenticating your domain in Sendora if you have access to your DNS settings.
You can prepare the campaign while DNS records propagate. Wait until verification succeeds before sending if you want to use your own domain.
4 Design a simple email
Start from a template or build your message in the editor. For a first send, use a short structure: one clear promise, useful copy, one piece of evidence or illustration, and one primary button.
- place the most important information near the top;
- use short paragraphs and enough white space;
- include one primary call to action;
- use compressed images with alternative text;
- keep the unsubscribe link included in the email.
Check the result on both desktop and mobile before continuing.
5 Create the campaign
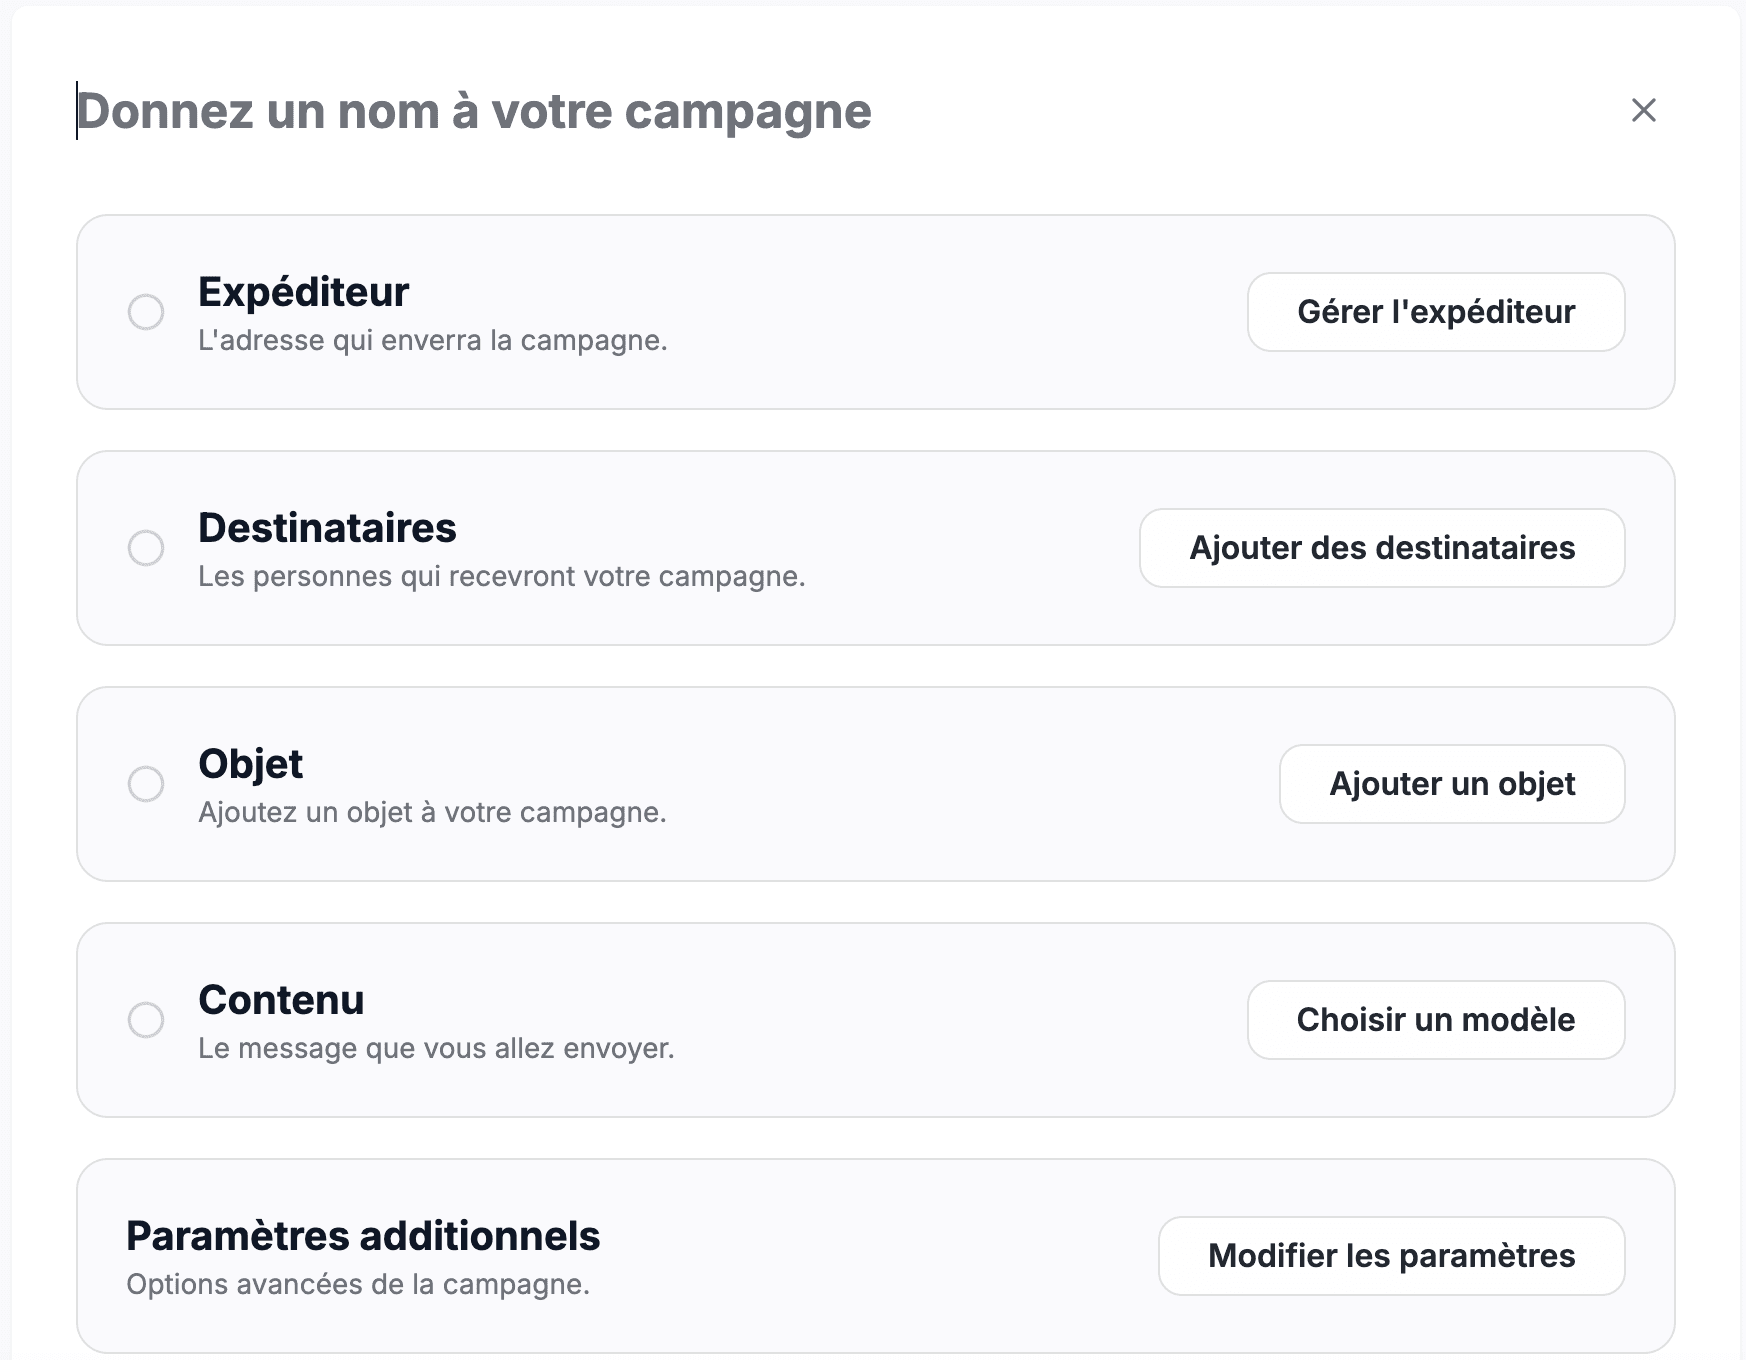
Create a campaign and give it a clear internal name. This name helps you stay organized, while the subject line is what recipients see in their inbox.
Complete these fields carefully:
- subject line: specific and faithful to the content;
- preview text: additional context displayed beside the subject;
- sender name and address;
- reply-to address: an inbox monitored by your team.
6 Send a test
Never send a campaign to the full list without testing it first. Send it to yourself and, when possible, another person. Open it on a phone and a computer, then check:
- the subject, sender name, and preview text;
- spelling, prices, dates, and contact details;
- every link and the primary button destination;
- image loading and readability;
- the reply-to address and unsubscribe link.
You cannot correct an email once it has reached your contacts' inboxes. Take a few minutes to have the test reviewed.
7 Choose recipients and send
Select only the lists relevant to the message. Check that the recipient count matches your intention. Sendora excludes unsubscribed contacts so they do not receive another campaign.
You can send immediately or schedule a date and time. For your first attempt, choose a time when you can monitor replies and any delivery issues.
Final check before sending
- the correct list is selected;
- the domain or sender address is verified;
- the test arrived and every link works;
- the content matches the subject line;
- someone is available to handle replies.
8 Read the first results
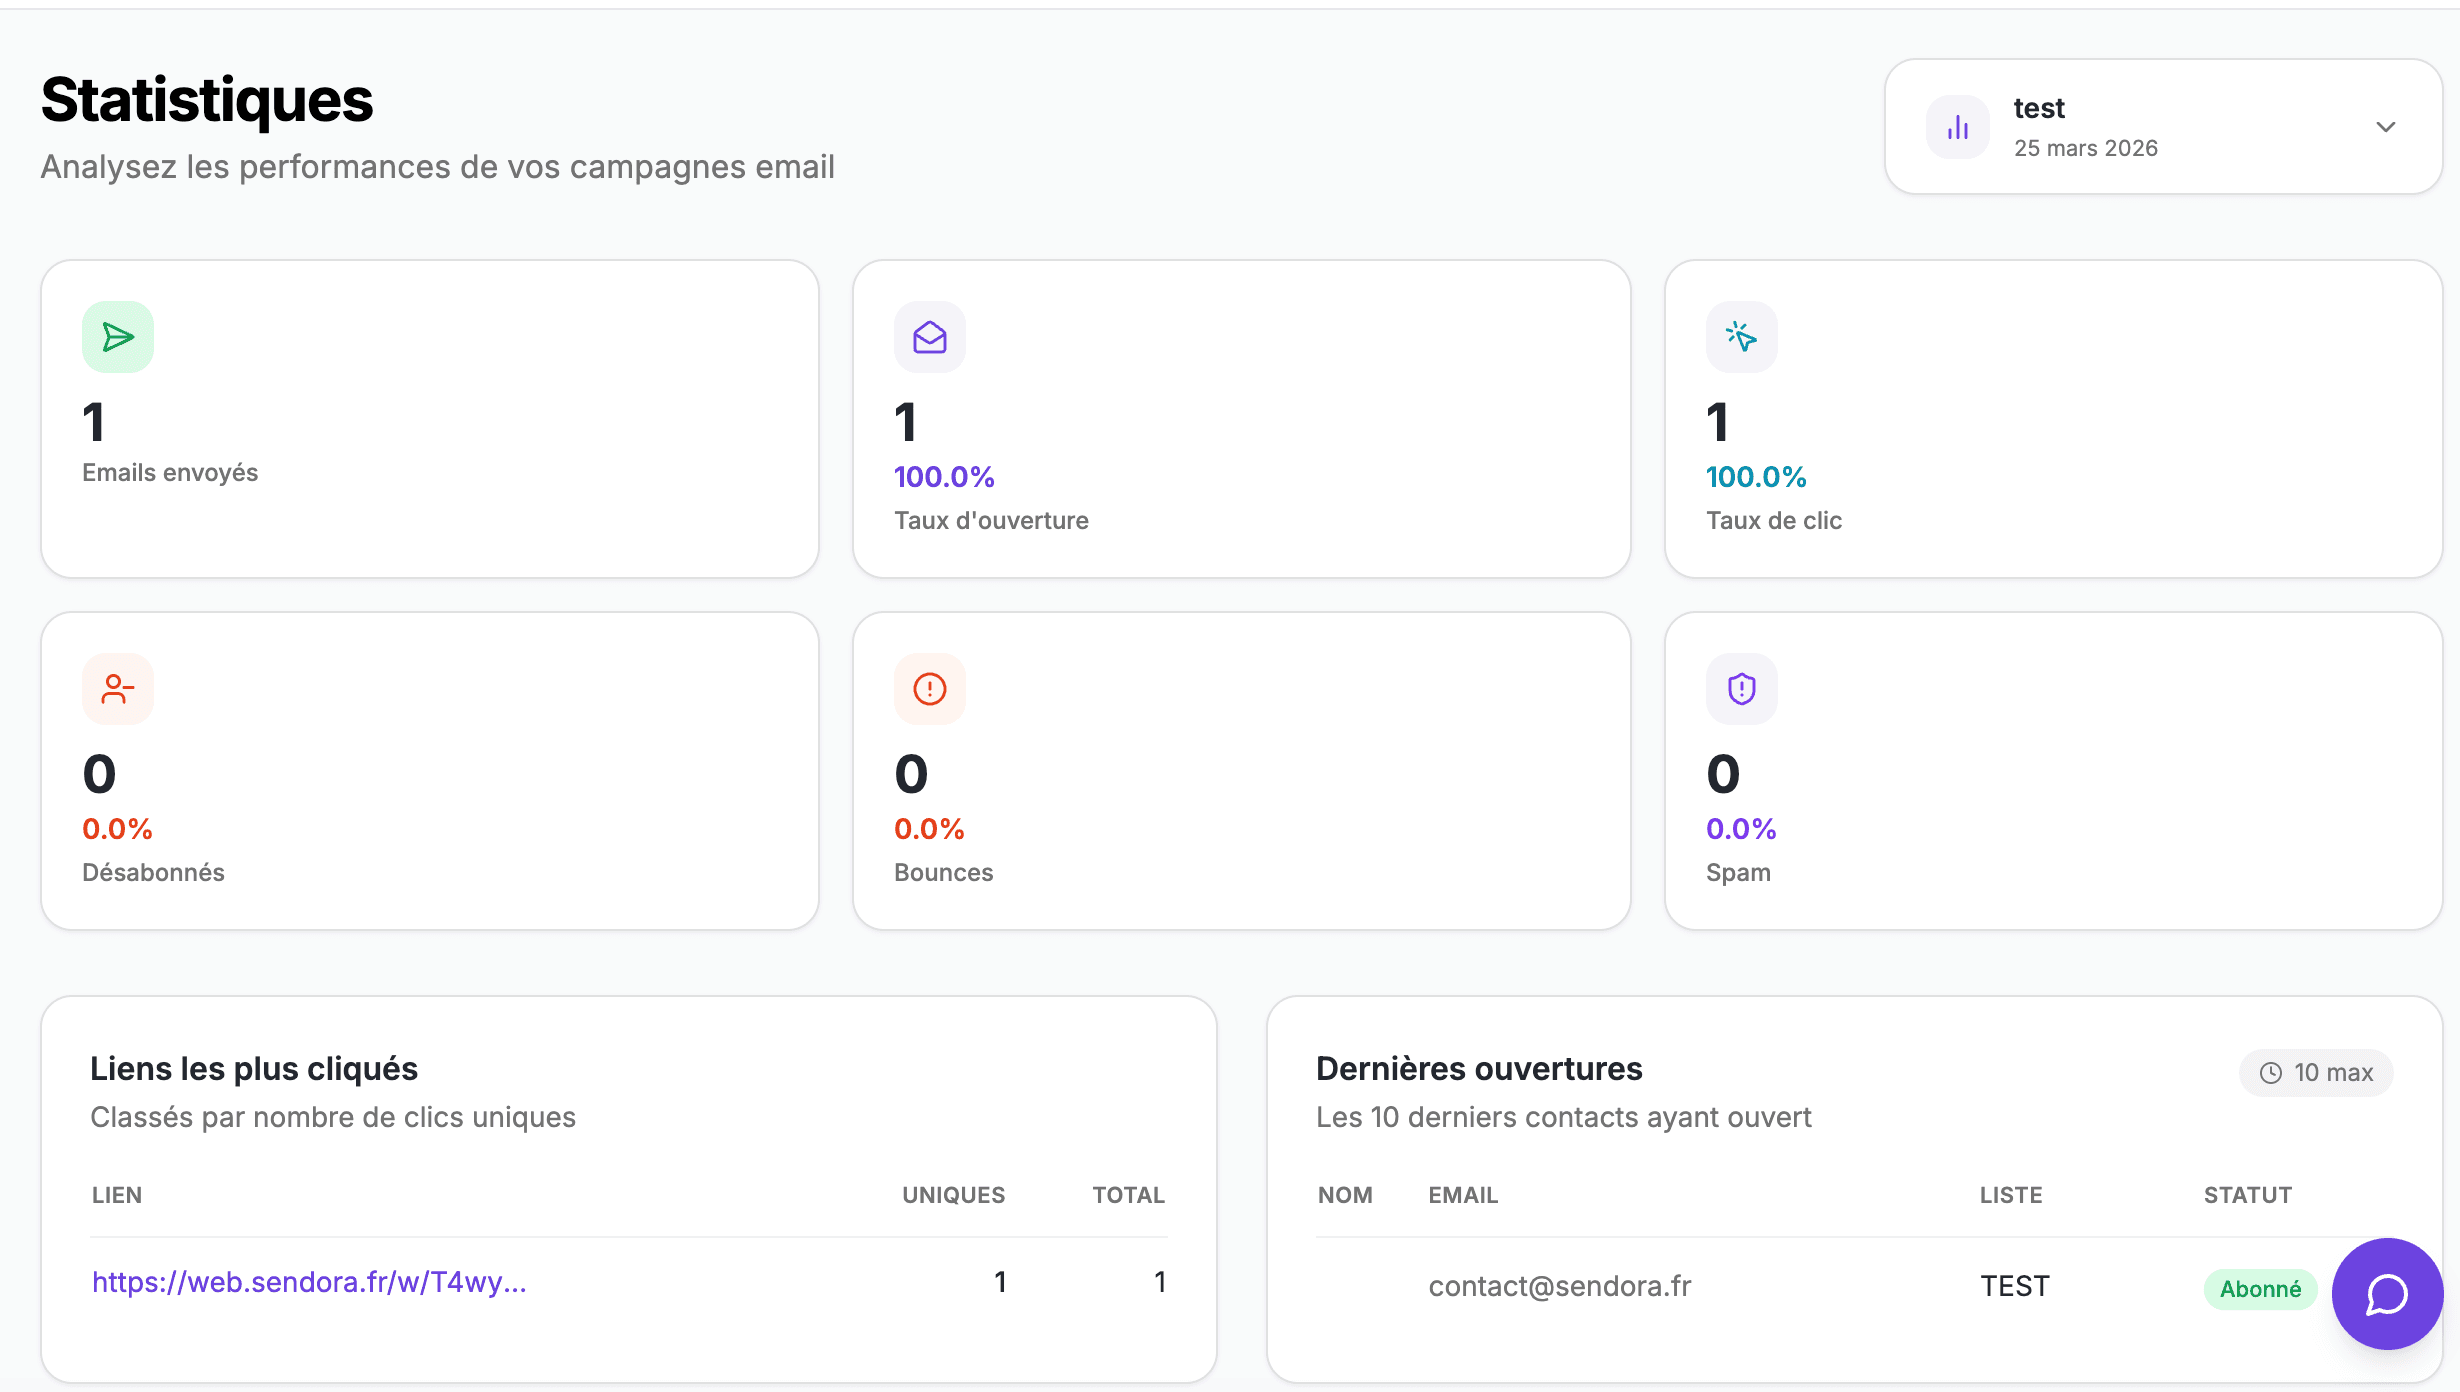
After sending, open the campaign statistics. Do not draw conclusions after only a few minutes, as opens, clicks, and replies appear gradually.
- Delivered: messages accepted by recipient mailbox providers.
- Opens: a reading trend that should be interpreted cautiously.
- Clicks: contacts who interacted with a link.
- Bounces: addresses or mailboxes where delivery failed.
- Unsubscribes: contacts who no longer want campaigns.
Compare results with the original goal, such as replies, bookings, quote requests, or sales. Record one simple improvement for the next campaign instead of changing everything at once.
For a deeper analysis, read Understanding your email campaign statistics.
Your next campaign
Your account is now ready and you have tested the complete journey. Keep lists clean, send only expected messages, and authenticate your domain. Consistency and relevance will matter more than high sending volume.